DIY Optical Hi-Hat sensor
If you need a Hi-Hat sensor here is a simple PCB to build one yourself.
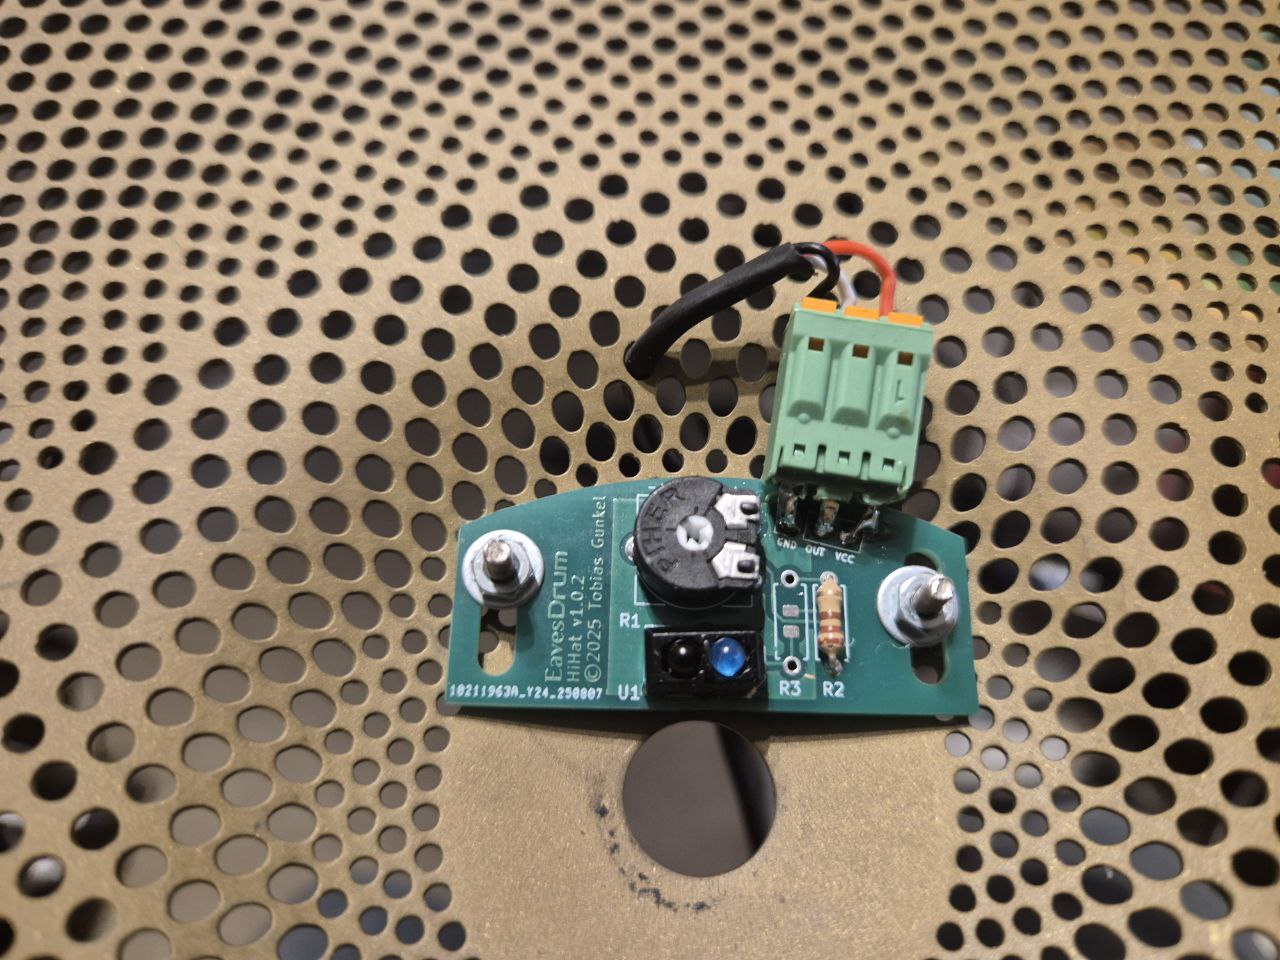
Assembly
The core of the PCB is a cheap TCRT5000 Infrared Reflectance Sensor.
- For the lower part use a 13” Low-Volume Cymbal. You may want to put a rubber rim on it, to reduce the noise.
- For the upper part use a 14” (rubber) Cymbal Pad.
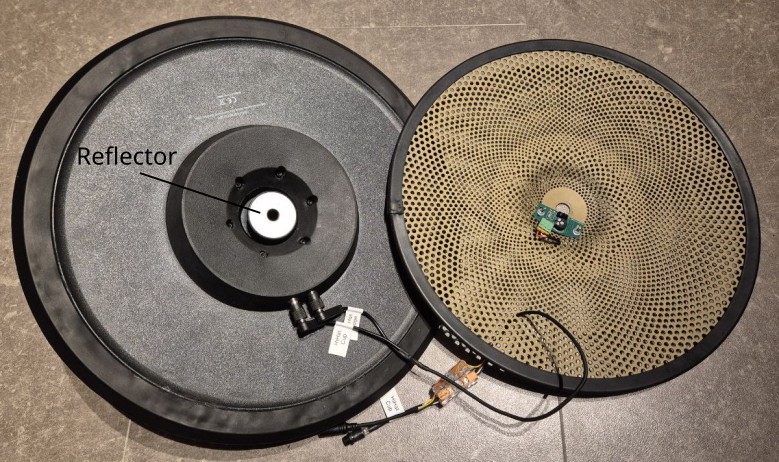
- You will need a reflector on the top cymbal right above the IR sensor to reflect the light.
- If you can get a reflector of a “real” e-Hi-Hat like the one in the picture above, go for it.
- A plastic disc with a diameter of 4 cm and black electrical tape on it will probably work too. Put a hole in the middle so that you can screw it onto the Hi-Hat clamp.
- Make sure the disc is not too reflective (i.e. do not use a CD or a mirror).
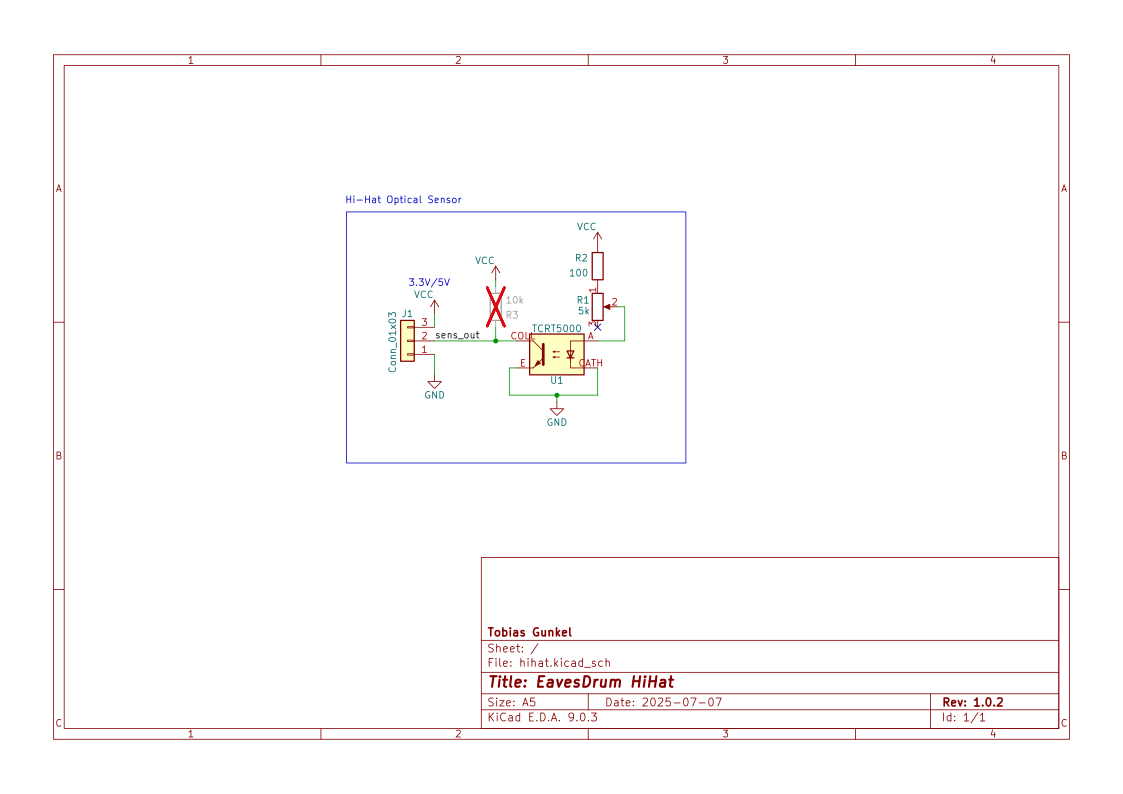
Schematics
All files that you need to order your Hi-Hat Sensor PCB (GERBER file, …) are here.
Bill of material (BOM)
| Component | Designator | Quantity | Price / Unit | Price Total | Comment |
|---|---|---|---|---|---|
| Potentiometer 5k | R1 | 1 | 0.35€ | 0.35€ | Supports Piher PT10 (10mm) / PT6 (6mm) or Bourns TC33 (SMD) |
| Resistor 100 Ohms | R2 | 1 | 0.03€ | 0.03€ | THT or SMD 0805 package, 125mW (or 250mW), 1% or 5% |
| n/c | R3 | 0 | - | - | Not required, as the EavesDrum module already has a pull-up resistor (R11) on it’s ADC2 input |
| TCRT5000 | U1 | 1 | 0.30€ | 0.30€ | |
| 3-Pin Header (male) | J1 | 1 | 0.09€ | 0.09€ | |
| PCB | - | 1 | ~4€* | ~4€* | * Example for 5 PCBs at JLCPCB excl. Shipping/Tax. Shipping/Tax is approx. 2.50€ (Global Direct) or 7.50€ |
| Total | 24.66€ |
If you search for a shop for the TCRT5000 and are located in Germany you might want to take a look at BerryBase.
Connector
| Pin | Function | Comment |
|---|---|---|
| 1 | GND | Connect to the GND of the EavesDrum Trigger Module. Usually the shield / metal housing of the SUB-D37 connector |
| 2 | OUT | Sensor output. Connect to the ADC2 pin of the EavesDrum Trigger Module |
| 3 | VCC | Supply Voltage (3.3 or 5V) for the IR LED. Connect to hh_vcc of the EavesDrum Trigger Module |
Adjust IR brightness and sensitivity
You can adjust the brightness of the IR LED as well as the sensitivity of the IR sensor.
For the brightness:
- The Supply voltage of the
hh_vccoutput of the EavesDrum Trigger Module can be switched by the jumper / slide switchJP6between 3.3V and 5V.- Both should be fine but the IR LED brightness will be higher with 5V.
- You can also regulate the brightness with the potentiometer
R1on the Hi-Hat sensor module. You can see the brightness of the IR LED with your smartphone camera (as long as it does not have an IR filter). - It is best to open the EavesDrum drum UI and monitor the Hi-Hat Pedal. This way you can adjust the brightness of the IR LED easily.
- Just make sure that the signal uses most of the range between 0% and 100%.
- If the level is near the
closedlevel even when the Hi-Hat is fully opened: decrease the brightness. - If the level is near 0% even when the Hi-Hat is fully closed: increase the brightness.
For the sensitivity:
- Use potentiometer R11 on the EavesDrum Trigger Module. Simply turn it to the center position. This will probably be good enough.